Tutorial
This is the decu tutorial. Follow a long for a tour of decu's main
features.
Example Project
After you have installed decu in your (virtual) environment, you can
follow along with this example project. This example will showcase the
three main sets of functionality that decu provides: project
organization, bookkeeping, and inspection. It is best if you follow along
by copying and pasting the source code we show below in a temporary
project.
Project organization: decu init
The first step is to get our file system set up to run an experimental
computation project. Navigate to an empty directory where your project is
going to live. Call this directory root_dir. Now execute
$ decu init
Initialized empty decu project directory in <root_dir>
decu follows a somewhat strict template of what a project filesystem
should look like, and with $ decu init, all we're doing is setting up
root_dir to reflect decu's organization. If you now ls your
root_dir you will see something like the following.
root_dir
    src
    data
    logs
    pics
    results
The purpose of each directory created by decu is straightforward. The
data directory is assumed to contain raw or processed data files. The
logs directory will store the logs of running experiments. The pics and
results directories will hold plots, figures, and result files generated
by your decu scripts. The src directory will contain said scripts.
Project bookkeeping: decu exec
With this directory structure, we can now start coding our computational
experiments. Create a file script.py inside root_dir/src that contains
the following.
import decu

class MyScript(decu.Script):
    @decu.experiment(data_param='data')
    def exp(self, data, param, param2):
        return [x**param + param2 for x in data]

    def main(self):
        data = range(100)
        result = self.exp(data, 2.72, 3.14)
In script.py we subclass decu.Script, define an experiment method
exp, and call it on some data from the main method. Note that the
method is decorated with @decu.experiment which requires us to specify
which of exp's parameters is treated as the data input. All other
parameters are treated as 'experimental parameters'. More on experimental
parameters later. That's basically all that this code does.
What could we expect decu to do in this simple example? Bookkeeping! Note
that we didn't save the results of our experiment to disk, or used log
files or print calls to document what the script is doing. This was not
an oversight, it was on purpose. In fact, decu will do all of this for
us.
Before running the above script, the directory structure should look as follows.
root_dir
    src
        script.py
    data
    logs
    pics
    results
NOTE: After having called$ decu initinroot_dir, all successive calls todecushould be made fromroot_diritself. That is, do notcdintosrc/and then calldecu. All console commands from here on will be done fromroot_dir.
Simple run
Now cd to root_dir again and run our script through decu.
$ decu exec src/script.py
After executing script.py, we can now take a look at what happened to
root_dir.
root_dir
    src
        script.py
    data
    logs
        log_file1--0.txt
    pics
    results
        result_file1--0.txt
Here, both log_file1.txt and result_file1.txt will have a name
including the date and time of execution and the name of the script that
generated these files, among other information.
This is (one of) the main features of decu. We needn't specify what
information we want to log, or the file name where we want to save our
experimental results. In fact, we didn't even need to manually save the
results to disk ourselves. decu will take care of the bookkeeping.
To see more specifically what decu saves to the log file, do
$ cat logs/log_file1.txt
[<time>]INFO: Starting exp--0 with {'param': 2.72, 'param2': 3.14}.
[<time>]INFO: Finished exp--0. Took 4e-05.
[<time>]INFO: Wrote results of exp--0 to results/result_file1.txt.
Since our script is very simple, decu just needed to log three
lines. However, you fill find there's a trove of information here. Without
writing a single line of logging or I/O code, we now have:
- a unique file with a time-stamped recount of what our script did,
- a record of the experimental parameters with which
expwas called, - the time it took to run
exp, - a file containing the results of running
expwith the recorded parameters. This file contains in its name the name of the script and the function that generated its contents.
To understand why the log_file1.txt logs the call to exp as exp--0,
we need to modify script.py a little.
Multiple runs
import decu

class MyScript(decu.Script):
    @decu.experiment(data_param='data')
    def exp(self, data, param, param2):
        return [x**param + param2 for x in data]

    def main(self):
        data = range(100)
        result = self.exp(data, 2.72, 3.14)
        params = [(data, x, y) for x, y in zip([1, 2, 3], [-1, 0, 1])]
        result2 = decu.run_parallel(self.exp, params)
We have included further experiments now. We are calling the same method
exp but with a different choice of parameters each time.
decu.run_parallel(method, params) will call method(*l) for each element
l in params, and it will do so by using Python's multiprocessing
library, which means that these experiments will be run in parallel.
To execute this new version, we do
$ decu exec src/script.py
First of all, take a look at the current state of root_dir, after a
second run our script.
root_dir
    src
        script.py
    data
    logs
        log_file1.txt
        log_file2.txt
    pics
    results
        result_file1--0.txt
        result_file2--0.txt
        result_file2--1.txt
        result_file2--2.txt
        result_file2--3.txt
Here's what happened: decu created a new log file for this second
experimental run, log_file2.txt. It also generated one result file for
each of the experiments we ran. To understand the contents of the new
result files, we need only read the new log file. (Your output maybe
slightly different in the order of the lines.)
$ cat logs/log_file2.txt
[<time>]INFO: Starting exp--0 with {'param': 2.72, 'param2': 3.14}.
[<time>]INFO: Finished exp--0. Took 0.0004s.
[<time>]INFO: Wrote results of exp--0 to results/2017-10-20 18:21:28.374962--script--exp--0.txt.
[<time>]INFO: Starting exp--2 with {'param': 2, 'param2': 0}.
[<time>]INFO: Starting exp--1 with {'param': 1, 'param2': -1}.
[<time>]INFO: Starting exp--3 with {'param': 3, 'param2': 1}.
[<time>]INFO: Finished exp--2. Took 4e-05s.
[<time>]INFO: Finished exp--1. Took 5e-05s.
[<time>]INFO: Finished exp--3. Took 6e-05s.
[<time>]INFO: Wrote results of exp--2 to results/2017-10-20 18:21:28.374962--script--exp--2.txt.
[<time>]INFO: Wrote results of exp--1 to results/2017-10-20 18:21:28.374962--script--exp--1.txt.
[<time>]INFO: Wrote results of exp--3 to results/2017-10-20 18:21:28.374962--script--exp--3.txt.
The first three lines are familiar. They correspond to the call to exp
that we had before, and they provide similar information. We now know that
result_file2.txt contains the result of running exp with parameters
{'param': 2.72, 'param2': 3.14}. Then we used run_parallel to run exp
over a list of parameters, and we get the last nine lines, which contain
similar information as before, but for the three additional times we called
exp. Observe that each time we call exp, the log file includes two
dashes followed by a number, --x. This is a way for identifying different
calls to the same experiment, and serves to tell which result file belongs
to which experiment call. Note that the result files also contain the same
identifier at the end. Without this identifier, our result files would all
overwrite each other, or else there would be no way to tell which contains
the result of which experiment call. In the example above, we need only
match the identifier of a result file name with the experiment identifiers
in log file, to know
- the method that generated the result file,
- the time it took to generate the file, and
- the experimental parameters that were used to generate it.
In other words, with these identifiers we can cross-reference results and
experiment runs by using the log file. The run identifiers are guaranteed
to be unique for each call to exp, even when using parallelism with
run_parallel.
Oh, never mind the fact that we just used multiprocessing to run our
experiments in parallel, with no additional imports and in a single call of
run_parallel.
Figures
So now decu is handling logging, directory bookkeeping, cross-referencing
experimental parameters and results, and parallelism, in 12 lines of
python (two of each are empty BTW). But there's more!
Say now that you want to plot a pretty picture from your results. Enter the
@figure decorator, used in the following version of script.py.
import decu
import matplotlib.pyplot as plt

class MyScript(decu.Script):
    @decu.experiment(data_param='data')
    def exp(self, data, param, param2):
        return [x**param + param2 for x in data]

    @decu.figure()
    def fig(self, data, results):
        for res in results:
            plt.semilogy(data, res)

    def main(self):
        data = range(100)
        result = self.exp(data, 2.72, 3.14)
        params = [(data, x, y) for x, y in zip([1, 2, 3], [-1, 0, 1])]
        result2 = decu.run_parallel(self.exp, params)
        self.fig(data, result2)
After importing matplotlib, we have added the fig method, which we have
decorated with @decu.figure(), and we call at the end of main.
You know the drill now:
$ decu exec src/script.py
The root_dir should now look as follows.
root_dir
    src
        script.py
    data
    logs
        log_file1.txt
        log_file2.txt
        log_file3.txt
    pics
        fig_file1.png
    results
        result_file1--0.txt
        result_file2--0.txt
        result_file2--1.txt
        result_file2--2.txt
        result_file2--3.txt
        result_file3--0.txt
        result_file3--1.txt
        result_file3--2.txt
        result_file3--3.txt
As before, we get our log file log_file3.txt and four result files. We
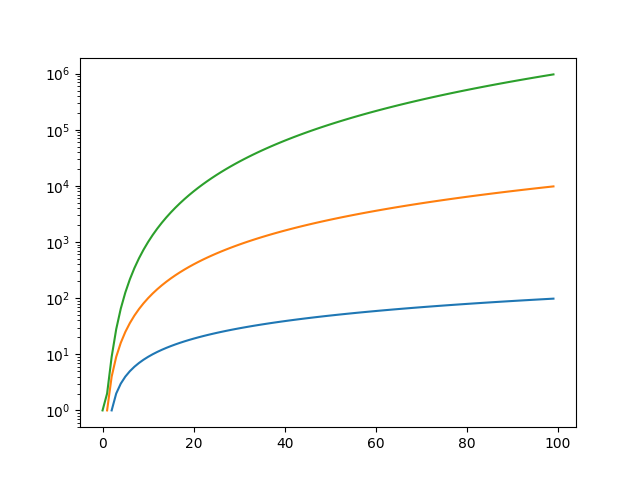
also get out plot inside pics/. "But wait!"-I hear you say-"we never
saved the plot to disk!" Exactly. You can open this file to convince
yourself of how wonderful decu is.
You can also read the log file to see that it mentions which method
(fig) generated the new figure file.
Project debugging: decu inspect
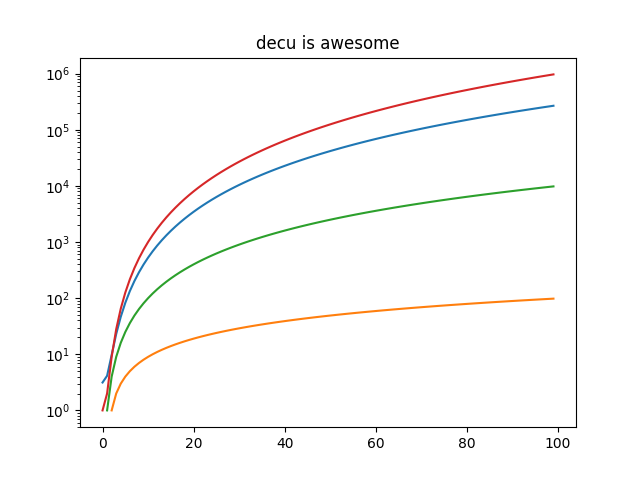
Oh, darn. We forgot to add a title to our plot. After we have modified our
fig function to include a nice title, we can generate the new plot in a
number of ways. First, we can run the whole thing again. This becomes
increasingly cumbersome (and sometimes outright impossible) if exp takes
too long to run, as it often does in real life. Second, since we have the
result file, we can pop into a python interpreter, read the result from
disk, and call fig again. This would require us to not only load the
result, but the file script.py and instantiate the class MyScript. How
tedious.
OR, we can use decu to do exactly that.
$ decu inspect results/result_file3*
import decu
import numpy as np
import src.script as script
script = script.MyScript('root_dir', 'script')
# loaded result

In [1]: data = range(100)

In [2]: script.fig(data, result)

In [2]: exit
If you have the necessary data in a file, then another possibility is:
$ decu inspect result_dict=results/result_file3* --data=data/data_file1.txt
import decu
import numpy as np
import src.script as script
script = script.MyScript('/tmp/root_dir', 'script')
# loaded result
# loaded data

In [1]: script.fig(data, result)

In [2]: exit
And in that case, yet another possibility, and the most efficient one, is
to use the -c flag:
$ decu inspect -c "script.fig(data, result)" \
result_dict=results/result_file3* \
--data=data/data_file1.txt

import decu
import numpy as np
import src.script as script
script = script.MyScript('/tmp/root_dir', 'script')
# loaded result
# loaded data
script.fig(data, result)
exit

$
The -c flag takes an arbitrary string, executes it after the initial file
loading is done, and then quits ipython. This makes it possible to fix our
figure in a single decu call, without having to drop to an interpreter or
manually load anything. Nifty, yes?
The final result is: